DIY Tiara Wire Guide
 Many ballet headpiece tutorials, kits, and classes never go into all the details about the wire they use. Sometimes you are given a pre-built frame while others detail just what they use in the project you are learning. Below, is everything I currently know about wire use in dance headpieces. If you are making a tiara for yourself, you may not need to use hard to find materials or work harden your headpieces. For those wishing to make headpieces for others, you will want to learn these techniques. I hope to outline when you can work with easier materials for a great result that will not be as sturdy, and times you will want to use stiffer materials to create rock solid pieces. Everything is a balance between ease to manipulate, ease to use and wear, longevity, and durability.
Wire Gauge
Wire gauge determines the thickness of a wire, not necessarily its strength. A higher number gauge indicates a thinner wire; a lower gauge wire is a thicker wire.
28 to 30-gauge: thread-like wire that if kinked, may break easily. Take care not to create kinks in this wire by smoothing out your wire after each pass–watch out for a crossed loop while you work (video link to be provided for individuals who have purchased my DIY tiara kit). Use this gauge to attach cup chain to your support wires or wire small beads or rhinestones to your design. I prefer to use 28-gauge wire for this purpose. Typically this gauge in any material you get at a craft store will be just fine.
24-gauge: a great gauge for adding beads and rhinestones to your designs that require more structural support. This wire gauge is not used in the designs I create like the Elise, as I provide more structural support using E6000/Amazing Goop glue in the finishing process–instead these components are wired using 28 gauge wire. Typically this gauge in any material you get at a craft store will be just fine.
20-gauge wire: great for creating the main designs for your tiara. It is easy to shape into a variety of shapes and provides adequate support if using a strong metal type such as half-hard stainless steel. For very opened, less intricate designs – where support is not provided by neighboring design elements; you should consider using 18-gauge wire. It also can be work hardened for added strength. If you are using this gauge for structure, I recommend this gauge in stainless steel, half hard or 3/4 hard wire — any brand will do, but I like Beadalon. For wire that doesn’t provide structural support — such as beaded accents — you can use any gauge or material typically available at the craft store
18+ gauge wire: a medium-heavy wire great for structural support. It is more difficult to intricately shape; however it will hold your design pattern and support larger rhinestones very well. It works especially well for open-pointed designs as it creates crisp angles. It also can be work hardened after a shape is created for even stronger support. The lower number you go, generally, the more difficult it is to shape the wire; however, it will hold the design strongly. Typically, I only use stainless steel. half hard or 3/4 hard wire. Furthermore, this wire gauge I only use for structural support.
Millinery Wire
If you have seen anything about ballet headpieces, you may have heard about millinery wire. It is made of galvanized steel and is wrapped in cotton, rayon, or paper. It comes gauges listed above; however it is often referred to as light, medium, heavy, and extra heavy weight:
- Light Weight = 24 gauge
- Medium Weight = 20 gauge
- Heavy Weight = 18 gauge
- Extra Heavy Weight = 16 gauge
As the name implies, it is used by hat and fascinator makers as well as people who construct dance headpieces. You will not be able to find this wire in craft stores, nor do you need to use this wire to make high quality headpieces. Don’t let the fancy name lure you into purchasing this material. It is made of galvanized steel wire, which can be purchased at hardware stores in certain gauge sizes. It can also be substitute with 316L stainless steel wire.
Typically, I will use millinery wire if making headpieces with buckram, when I want to match exposed wire to fabric or other design elements, or if my structural wires will be exposed, I’ll use black millinery wire (this tends to provide support for a design but not be visible on stage). Most millinery wire is difficult to bend into intricate shapes. It is near full hard in strength. Finished pieces are not easily shaped. I recommend you use 316L stainless steel wire if you are just starting.
Millinery wire has these benefits:
Millinery wire drawbacks:
Wire Hardness
The hardness of a wire is indicated by dead soft (also called soft), half hard, and full hard and in general refers to how easy it is to manipulate a wire.
Dead soft, or soft, wire is very easy to bend. It does not form hard angles, make a sharp bend, and does not hold a shape very well. Dead soft wire is mainly found in wiring components to other stronger components that are well-supported and secure.
Full hard wire holds shapes very well but is quite difficult to form. It is not a good choice for forming spirals or other tight shapes. You will not use this type of wire in tiara making, as it is too difficult to manipulate.
Half hard wire is between dead soft and full hard. You can use it for structural work; it can be bend easily into spirals and other shapes; and it will maintain that shape afterwards. I recommend using half-hard wire for tiara wire work for primary and secondary structural elements.
I typically use 3/4 hard stainless steel wire in my projects. It is some where between full hard and half hard.
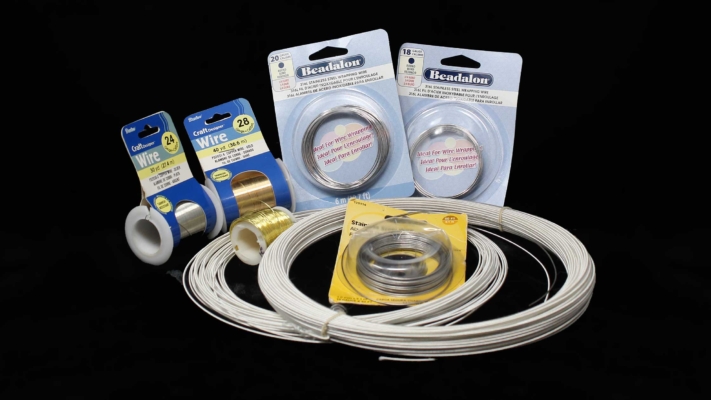
Wire Materials
This list could include just about every metal you can think of! Here I will focus on the main wire types found in stage headpieces: aluminum, copper, and stainless steel. Aluminum and copper based wires are plentiful in craft stores. Bead Landing, Artistic Wire, and Beadalon are common brand names found in stores.
Aluminum: If the wire packaging does not tell you what it is made from and it is on the cheaper side, it is most likely made of aluminum. It usually comes dead soft or has been anodized, which is a chemical process that adds a coating to the exterior wire–often times in colors like silver, gold, or even purple and blue. It is extremely light-weight and tarnish resistant. If it has been anodized, you want to make sure not to scratch the coating. Also be careful working with smaller gauge as it will kink easy and break. Typically a thicker gauge wire is used and/or it has been worked hardened, which isn’t always successful. Frankly, I try not to use aluminum based wires. If I do use it, I only use it for non-structural support wires or wires that will be further reenforced with glue. Don’t get me wrong; you CAN use aluminum wire for tiara designs! But, it has to be used in the right manner. I have seen aluminum wire offered in different wire hardnesses online; however, I haven’t found a reason to purchase any. I can’t say that a harder aluminum wire would be a great choice for headpiece designs.
Copper: a more expensive wire that usually is found in craft stores in dead soft. It takes to work hardening more readily than aluminum, and also comes coated in colors. A well-known brand is called Artistic Wire. You can purchase this wire in gold, silver, and about any color you can dream. Like aluminum wire that has been coated, you want to be careful not to scrape off the coating.
Steel – galvanized or stainless: I love using steel in my projects. Galvanized steel has a zinc coating to protect from corrosion; whereas stainless steel is mixed with chromium during the wire’s manufacturing process. They will both hold up to water exposure; however, salt water will corrode the zinc coating on galvanized steel (sweat does contain salts) and chlorine with corrode stainless steel. Galvanized steel is cheaper. I tend to work with stainless steel the most unless my project is using millinery wire for a reason listed above.
Work Hardening
I haven’t created a DIY ballet headpiece tutorial that uses work hardening to add strength to your tiara designs. I do plan on adding one for an open air pointed design as well as a diadem. Current tutorials use a smaller gauge wire to provide strength. Work hardening for tiara designs is best employed by shaping your wire before adding the metallic cording, or by forgoing the addition of cording and hardening the materials as you build your design. I feel it is important to mention this technique and its general purpose and process in case you would want to explore it at your own pace.
Work hardening can give your pieces an indestructible feel. The design will maintain its shape unless a good amount of force is used to alter it. However, it is not always the best approach. You must consider the audience for whom you are constructing your headpieces. End-users who haven’t experienced this type of headpiece may find it unruly. Reshaping these headpieces to conform to the head isn’t straight forward and can be intimidating. In addition, affixing the tiara to the head can be daunting for one person. It may take one person to hold it in place and another to pin it into place. Solo dancers at competitions may not have this luxury. And lastly, some dancers simply don’t feel secure wearing these designs because it doesn’t hug their head tight enough.
Headpiece designs that feature unconnected pieces that could bend or break if dropped are well suited using this construction technique as well as circlets/diadems (think elven style headpieces that wrap around the forehead). You will find larger companies with wardrobe departments constructing headpieces using this technique due to its longevity. Furthermore, their dancers are fortunate to have at their disposal these specialists, which makes some of the above concerns moot and the employment of this technique a superior decision.
There a several ways to work harden your pieces these are the most commonly ones I have used.
- running your wire through nylon jaw pliers
- using a hammer against a steel block…hammering the piece makes it stiffer
Not technically a work hardening method because it uses heat, tempering is a way to harden your wire structure by heating it to precise temperature and then dunking your piece in cold water. I will not be teaching this technique, as it is complicated as well as dangerous. The other two techniques will be discussed in other tutorials; however, in the meantime here is a video that quickly display the hardening techniques.
Just a warning: if you over-work your wire, it will become brittle and easy to break. It is important to develop and retain some spring and not make over-stiff designs. Headpieces still need some mailability to shape to a dancers head and accommodate other preferences.
Design Considerations
A combination of wire gauge, wire hardness, wire material, and work hardening will determine the tiara’s strength, pliability, and durability. A tiara too stiff will not shape and form around a dancer’s head easily. One too soft and pliable will not be durable and could break at the most inopportune time.
I refer to wire as three different types: structural wire, secondary structure wire, and non-structural wire. Structural wire supports the main design of your headpiece. For some designs this may only be the tiara base and it will use the thickest wire gauge. In other designs, structural wire may be incorporated in the main tiara design (the top part – not just the base) — such as a pointed design. If your design is uses interconnected wires you can use secondary structure wire — which simply means it is a thinner wire gauge. It will be reenforced by its additional reliance on its neighboring elements. Non-structural wire is used to wire components that do not support the design of the headpiece, such as wiring rhinestone cup chain or beads to your structural wire.
Designs can be made with multiple wires or a single length of wire. A single wire design tends to offer the best structural support; although, you cannot make intricate shapes easily. Multiple wire designs can have the same strength as a single wire design; however, the separate wires will need weave between each other or you must use a strong glue to reenforce the design’s weak points.
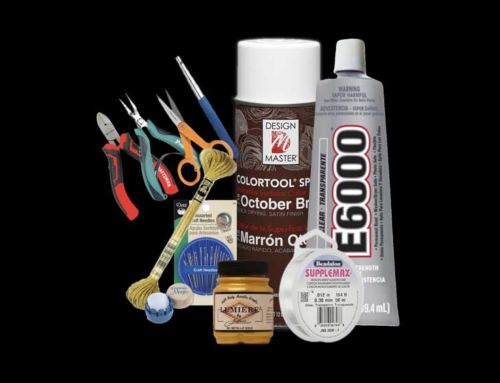
Recommended supplies & options to purchase
….coming soon. Content will be added once the instructional section has been completed, as I am only sharing these recommendations to those who have joined the learning community.