DIY tiara tools & materials you need to supply
Below are all the tools and materials you should gather before your kit materials arrive. My how-to guide includes many optional steps that I perform, but you may want to skip. For these optional items, you may want to wait until you have your kit and instructions to decide if you want to purchase the needed supplies. I have provided links to most supplies. If you have suggestions or questions, please send me an email using the contact form.
Required tools
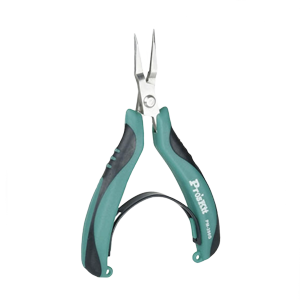
Long Nose Pliers
I use these to twist wires ends together and bending the ends of a wire into a shape. I love needle nose pliers that are short in length and have super tiny ends. I find it easier to get into tight spaces and make adjustments in the end of a wire’s bend. After I started using the Pro’stech, I never picked up any of my other pliers. These are similar to chain nose pliers, except they do not have a rounded exterior.
Purchase Options:
- Proskit PM-396G S also here
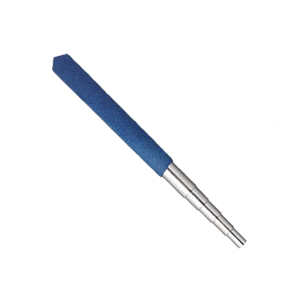
Jump Ring Mandrel
I use a jump ring mandrel to form the round wraps surrounding chaton montees (aka swirls). You do not have to buy one of these. But, I highly recommend this tool, as it makes forming consistent sizes, which in my method is extremely important in creating symmetrical designs. If you decide to use a pencil, pen, or other circular tool to form these shapes, you will want something around 6-7 mm. I personally own the Beadalon set linked here but have also provided an alternative.
Purchase Options:

Wire Cutters
I have bought numerous brands from the craft stores and have landed on the 4.5″ Craftsman cutters from Lowes. All wire cutters will dull over time. I find the craft store brands don’t last as long as hardware store brands. They also cost less.
Purchase Options:
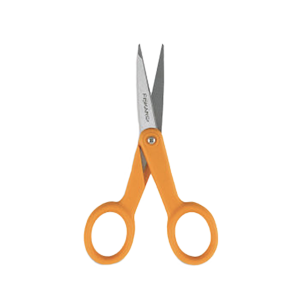
Scissors
I use a small set of Friskars scissors for snipping gold cording, thread, or cutting horsehair to length. You can use whatever scissors you have! Just letting you know to have these at hand when you begin your tiara project. It will be one of the first tools you will need.
Required & optional materials
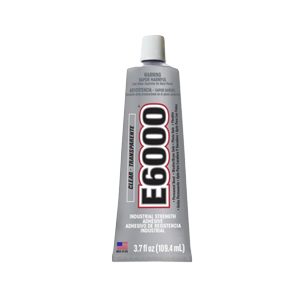
Gluing Supplies
Glue is used from the very start of this project, and a large amount of it is used for Recommending Finishing B. Please do not to buy the tiniest tube; you will run out of glue during Recommended Finishing B.
- You will need an industrial glue like E-6000 or Amazing Goop. You can find these online at craft or hardware stores. Please read my brief discussion about glue by clicking here.. Purchase a large tube.
- If you are sensitive to these glues, you will want protective equipment: respirator & gloves
- Application helpers: small paper plates or scrap cardboard, toothpicks, & a paper towel
Hair Attachment Supplies
These supplies are for the last step. You and provide an attachment point for the headpiece. Read here for more information.
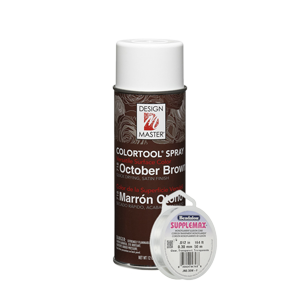
- Design Master spray paint to match hair color: for brown hair I recommend October Brown; for blondes I recommend Design Master’s TintIT series in sepia; you can also use black or leave it white. Purchase from craft stores or JoAnn Fabrics.
- A sturdy thread such as silamide or a strong nylon beading thread. Personally I prefer to use clear nylon beading thread because it leaves the tiara base free of visible stitch marks.
- Sewing needle and scissors.
Optional Finishing A
This step is performed before Recommended Finishing B and is to protect against tarnishing of base-metals used in cupchain. It is 100% optional. For first timers, I would recommend skipping this step. It is very time consuming and requires an extraordinary amount of patience. If you are adventurous, these are the materials required.
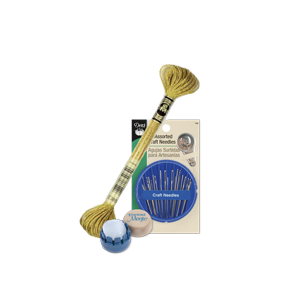
- Gold or silver embroidery thread. You can use any thread that suits you found at crafts stores and JoAnn fabrics. Here is one purchase option link.
- Large eyed embroidery/craft needles. I have this pack of needles. For this step I use the center size needle.
- Thread conditioner. This helps, but doesnt stop, the thread from fraying. Here is one purchase link.
Optional Finishing B
Optional Finishing B is a step where you make the back of your headpiece one color — usually gold or silver. If you don’t have a problem with your gold tiara showing the silver backs of rhinestones, you wont need these supplies.
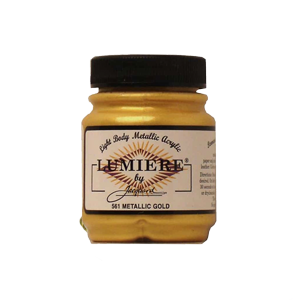
- Paint: I cannot sing the praises enough for Jacquard’s Lumiere paints. They are spectacular in all colors. For metallic colored tiara backs, I use metallic gold (561) or metallic silver (563). Sometimes you can find these at JoAnn Fabrics. I order online. Here are two options — here and here.
- Toothpicks: I apply the paint with a toothpick — usually the cheaper ones with a larger (not pointy) flat end. No cleaning brushes required; when finished–simply throw your toothpicks away!
- Paper towel: I keep my toothpick clean by wiping it off. Keeps the paint from getting gloppy (by drying) and making it harder to apply.
More Information About Glue
I tested several types of glue and have found these two best to recommend; however, you should be aware of the dangers using these products.
E-6000 and other type glues should only be used in a well-ventilated room. If you sensitive to chemicals or have concerns regarding the health warnings on these products, you will want to use gloves and a respirator while using these products. Please read the warnings and safety information provided on the back of the package to make an informed decision.
During the making of these instructions, I have opted not to wear safety equipment. However, I normally do wear vinyl gloves and a respirator when constructing my headpieces. I do this because I have a higher exposure to these materials than people who recreationally create headpieces. I highly recommend considering using gloves at all times when using this product. Opening a window or running a fan may be good enough; however, if you cannot do this because of the weather or other factors I recommended wearing a mask.
Materials
Wire
For this style of headpiece, I use a stainless steel jewelry wrapping wire. Please read my entire blog if you would like the complete in-and-out of wire options for ballet tiara making.
Purchase Options:
- Structure Wire: 18 gauge Bead-a-lon half-hard round wire.
- Structure Wire: 20 gauge Bead-a-lon half-hard round wire.
- Structure Wire: Just starting out? You can also a 20 gauge craft wire from a brand like Bead Landing from a craft store if you just want to try out these techniques. I do not recommend this wire for professional/commercial quality headpieces.
- 28 gauge copper wire in silver
- 28 gauge copper wire in gold
- You can also purchase any 28 gauge craft wire from your local craft store…such brands include Bead Landing. I recommend the copper core wire.
Cording
This cording has a center cotten core, which can removed. Once removed, you can insert your wire. The added cording provides a surface that the wrapping wire can grip to, thus, preventing slipping and sliding of your materials on your wire shape.
Purchase Options:
- I have seen this cording at Joann Fabrics, Michaels, and AC Moore. The location of these materials varies, so I cannot tell you precisely where to look. I will add an image.
- Gold cording offered by tutu.com
- Silver cording offered by tutu.com
Rhinestone Chain
The chain used in this tiara kit is what I call beginner chain. You get a lot, it is economical, and it looks great on stage even if it is not the highest quality chain you can buy. Once you are comfortable working with swirls and tight bends, you can move up to a more expensive chain like Swarovski (if you can find it) or Preciosa. The links in between rhinestones themselves is very important. You will not be able to make the same headpiece if you use a chain with a smaller space (like Swarovski or Preciosa) because the links are tighter. A price comparison, the two links below are 10 meters/30 yards for about $20. The same for Swarovski would be $200, and for Preciosa around $150.
Link to video using cheaper Chinese cup chain.
Link to video using Swarovski chain.
This material is also called cup banding and rhinestone chain if you are looking to source elsewhere.
Purchase Options:
- Multiple chain sizes and color: pick 14 SS
- Rhinestone Guy’s Preciosa cup chain — get 12ss — offered in gold or silver
Rhinestone
This project uses 29 or 30 ss Chaton Montee and 18 x 10.5 mm and 12 x 7 mm pear sew-on stones. You can use any quality of stone you choose, but I do recommend the highest quality for these accents as it produces the most spark on stage. If you use a super cheap stone, the foiling will separate from the stone when you apply glue ruining your project. I am working on a blog rhinestones, which I will link here. For now I recommend Swarovski, Preciosa, and the Rhinestone Guy’s Premium brand of stones.
